
Autumn Lantern with BlinkM
/ It's getting a little chillier in Southern California, but as an East Coast transplant I miss watching leaves change color. Using a BlinkM has been a great chance for me to bring fall color into my life in the form of a Lantern. When using a regular, tea light based lantern the only way to change the color is with the physical materials. Using a BlinkM I could imitate the way the leaves glow in the sunset with the light itself.
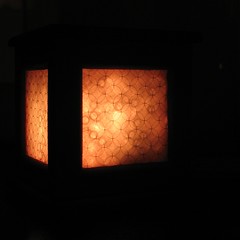
This is what it looks like done and blinking, kind of... the colors are a lot warmer than they are in the video (see the picture below)
http://www.youtube.com/watch?v=fcX6st6s7fg
Materials
For the non-BlinkM parts of this project I used items found in major chains (craft, hardware, office supply, grocery). All the BlinkM related items were sourced from SparkFun.
To create the light:
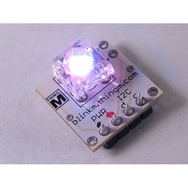 |
BlinkM from SparkFun or FunGizmos |
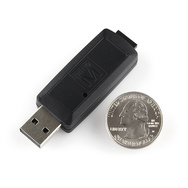 |
LinkM from SparkFun or FunGizmos |
 |
The light script I wrote |
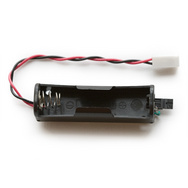 |
The 5V DC to DC Step Up - 1xAA at SparkFun may seem a bit expensive, but it only uses 1 AA battery (disposable or rechargeable) to generate the 5V the BlinkM needs. Super super handy. (photo is theirs) |
-
To make the lantern:
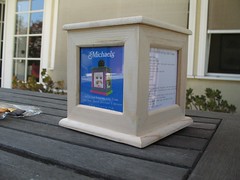 |
A rotating photo cube from Michael's |
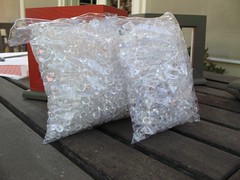 |
Clear acrylic beads, also from Michael's |
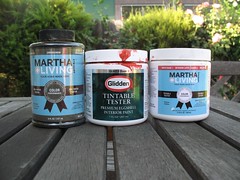 |
House paint in sample sizes |
| tin foil | |
| tracing paper | |
| a phillips head screwdriver to remove the rotating platform | |
| a flat razor blade to scrape labels off with |
-
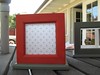
Step 1: Pick Your Lantern
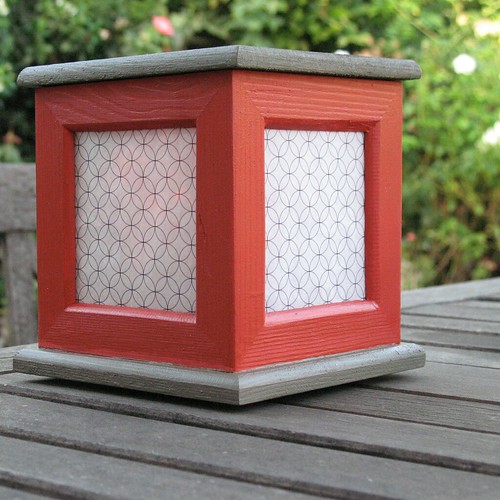
The lantern I used for this project is actually an “Unfinished Rotating Photo Cube” from Michael’s. I couldn’t find it on the web site, but they live in the in the paint-your-own section and run about $3.99 at both the one in El Segundo and in Santa Monica.
Pro: It is certainly big enough to a stash most BlinkM appropriate power sources in it.
Con: There isn’t, however, a lot of natural diffusion going on to help direct the light from BlinkM out in all 4 directions. I picked up some tracing paper, aluminum foil and “Decorative Accents - Clear Sparkling Jewels” (again not available online from Michaels) to help deal with this later.
Step 2: Paint The Lantern
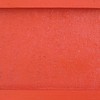
I knew I was going to go with a classic fall palette and was not really interested in spending a bunch of time custom mixing so I went a few doors down from Michaels to the Home Depot to rustle up some house paint samples. The queen of How-To herself, Martha Stewart, has a paint line, and, well, anything else you want to say about her, Martha curates a mean home décor color palette. So Heath (think tree bark), Milk, and Saffron (daylight interest?) ended up in my grocery basket.
 |
 |
 |
Something to keep in mind: the color picked for the inside of the lantern becomes a reflecting surface for the BlinkM. The lighter or brighter the color the more light will be bouncing around. The light will also pick up any color that is in the paint, too.
I’m not actually going to spend a lot of time explaining how to paint in general since these lanterns are pretty basic. Some tips before you get started though -
- Remove the spinning base (Phillips head screwdriver)
- Sanding is always recommended (but I didn’t)
- Paint your lighter colors first
- Super cheap craft paint brushes, even the foam popsicles are fine.
- You will want at least one sharp edged detail brush to do edging where you have two colors meet.
- Let things dry between coats. Really.
I made some experiments, but in the end the winner was the one shown with Saffron for the mid section and Heath for the lid and bottom lip.

Once it was all totally dry I put the rotating bottom back on, too. Well, actually, I didn't and plastic beads got a little everywhere when I did later. So you, you, should put yours back on here.
Step 4: Diffuse
As I mentioned before, the photo cube wasn’t designed to be a light source so it doesn’t have a nice shiny interior or frosted glass or anything like that. Thankfully those kinds of features are easy to add in this case.
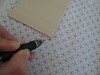
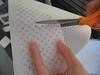
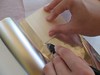
A) For a frosted glass look, line all 4 panels with tracing paper. Optionally you can print a pattern onto the tracing paper if you have an inkjet printer with a rear-loading tray. (link to PDF of pattern) I chose to put the tracing paper on the outside of the acrylic pieces for a softer feel. Putting the tracing paper on the outside also meant I could stress a bit less about getting absolutely every last trace of the adhesive from the stickers off, too. Shh. I didn’t tell you that. (Soaking in hot water helps, razor blade makes neat work of it but be careful)
 |
 |
 |
 |
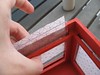
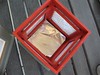
B) Put a square of tinfoil, shiny side up, at the bottom of the lantern to reflect light back up since the BlinkM will be face down. ( If the BlinkM was going to be sunny-side up I would have adhered the tinfoil to the lid)
 |
 |
 |
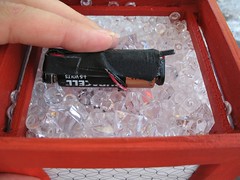
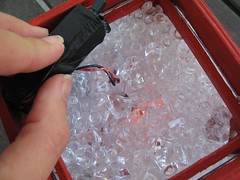
C) Add the acrylic beads / frosted marbles etc. to level high enough to reach the top of the lantern panes but leaving room to create a cozy little nook for the BlinkM. Check the effect with an actual BlinkM attached to the battery (the test pattern that comes preloaded on the BlinkM’s is fine for this)
 |
 |
Step 5: Let there be light
 Unlike a regular candle based lantern the “flame” color is also under your control. The light itself is the real protagonist. I didn’t finalize my sequence for sure until after the lantern was painted and it would be easier to see what it looked like diffused. If you want to just copy my pattern, these are the steps:
A) Download the BlinkM script by right-clicking or ctrl-clicking on the link and save it somewhere you can find it. It's called BlinkM_FallFlicker_v1_0.txt
B) Download the BlinkM Script Tool and put it in the same folder/directory as the script for convenience. (download for Mac OS X, download for Windows, or get the source code)
C) Plug the BlinkM into LinkM and plug the LinkM+BlinkM into the USB port. (picture above)
D) Open the BlinkM Script Tool and press the “Load” button on the bottom left of the screen (labeled 1). You’ll get a file browsing dialog box. If you’ve put the Script Tool and the script in the same folder you should see "BlinkM_FallFlicker_v1_0.txt" immediately. Otherwise navigate your hard drive in the usual fashion to find BlinkM_FallFlicker.txt, select it as the file you want to load, and press the Open at the bottom right of the dialog box.
E) Back in the main BlinkM Script Tool window third from the left is the "Send" button. (labeled 2) That is what puts the program on to the BlinkM. Hit that and you’re done. You can remove the BlinkM and attach it you your external power supply for testing in your lantern.

If you want to change the Fall Flicker script you can do so right in the Script Tool.
Each line has the format:
{time, { c , red_value, green_value, blue_value}}
The red, green and blue values are on a scale from 0 to 255 which are represented by 0x00 to 0xFF in Hexadecimal. The script files can mix decimal in with the hex if that is easier for you. Mine is all in hex because I created the original Fall Flicker script as an export from the BlinkM Multitrack Sequencer (found from the right hand column of the LinkM page).
The BlinkM Multitrack Sequencer lets you visually create patterns where each “note” persists for the same amount of time. That doesn’t work for flickering. While you absolutely can put the same color next to itself to create longer chunks, I found it easier to save my color sequence as a text file that could be opened it up in a text editor. Once opened I could randomly assign color lengths to each step. To preserve the custom lengths I used the script tool to do all further tweaking.
Going Further
And that was it! This is just one color scheme for a photo-cube lantern.
- You might want to go white and orange for the wood on the outside with a green “flame” pattern for St. Patrick’s Day.
- Or make a silver lantern with blues for an “under the sea” theme…
- Gold lantern with bright jewel tones all over the map for a treasure chest lantern…
These are just some of my random ideas. Have some fun!
 Honestly, though, the quickest and the dirtiest thing I could have done is grab a large glass jar, some tracing paper, shoved in a BlinkM, thrown some frosted marbles to help with light placement in and called it a day. Really. In fact I did. Let's call this one "Summer in a Jar" for my friends back East who are going to want to save up the last traces of summer and keep them around for January. (see video)
http://www.youtube.com/watch?v=KgipD-6Td4M
Remember, you can let the light be the attraction rather than the physical form of the lantern itself, so I’d encourage you to experiment. If you do decide that you want to go off the map and use something other than the Michaels’ photo-cube there are only three things really to keep in the back of your mind:
- Where am I going to stash the batteries?
- How am I going to help the light reach where I want it go ?
- How am I going to turn it on and off?
Answer those questions and you can stick a little custom light show in the form of a BlinkM just about anywhere.
