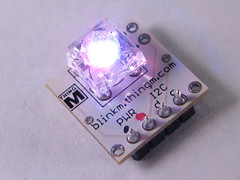
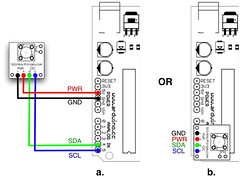
FreeM, an infrared BlinkM controller
/Since we first announced BlinkMs, people have asked us how to control them wirelessly. It's relatively straightforward to make something that controls a BlinkM wirelessly. There are plenty of technologies to choose from--Bluetooth, Zigbee, Z-wave, Wifi, etc.--and we experimented with most of them, but none of them combined the core qualities that we wanted:
- low-power use
- compact form factor
- easy configuration.
For example, TweetM is (at its core) a Wi-Fi BlinkM controller, but it's a relatively pricy solution whose main advantage over a cheap netbook is its tiny form factor (it does have other advantages that I'll cover in a future blog post). We shelved the problem until we could come up with a better solution. Infrared came up in the discussions several times, but it seemed too limited relative to all of the idea of distributed self-configuring networks that worked through walls.
Last year, however, we had a change of heart about IR. We were looking at how to control BlinkMs fifty feet from the control device. This is nearly impossible with stock I2C because of line noise, and leads to very slow data speeds in the best cases (not that stock I2C is all that fast to start with). However, we had clear line of sight between the controller and the BlinkMs, so IR control suddenly made sense. We also rethought our attachment to more complex technologies and decided that they were unnecessary. In most cases infrared's low bandwidth and line of sight operation works just fine. Most of our products are LED-based, and typically if you can see an LED that's producing light, you're within line of sight of its controller. Tod dusted off the part of his brain from a college summer job programming universal remotes, and put together a prototype.
Infrared is a somewhat maligned communication technology, thanks to the failure of IrDA to be broadly used for anything, even though it was installed in nearly every device in the late 90s (apologies if you love IrDA). However, thanks to more than 30 years of infrared TV remotes, the basic technology is cheap and robust, so the task became one of translating BlinkM commands sent over I2C to infrared sequences to create an "invisible wire" that connected the controller and BlinkM. The idea for FreeM was born.
As a first step, Tod implemented Sony's IR remote protocol (SIRCS), which is (somewhat) well documented and relatively straightforward. The FreeM Kit's beta firmware is primarily a Sony remote-to-BlinkM I2C converter. It maps a number of common remote functions to BlinkM commands, enabling simple infrared control of BlinkMs/MaxMs/MinMs.
One use we particularly like for it is when it's coupled with a MaxM Master board to control an RGB LED light strip. Since it's sending BlinkM commands, MaxMs work out of the box. The MaxM Master can power an 8-10 foot LED strip, so the combination of FreeM + MaxM + LED strip means that you can have the equivalent of a single giant RGB infrared-controllable LED.
FreeM also does some generic I2C-to-IR conversion as a first step to a true "invisible wire" that passes I2C commands transparently to I2C devices, but that's still highly experimental code. Use at your own risk.
The FreeM Beta Kit is available immediately from our friends at FunGizmos. They're pretty easy to assemble, with only a handful of big, through-hole parts that are easy to solder. The firmware is already on the chip. You just need to point a Sony remote at it to make it go.
We're still gauging the interest in FreeM before we commit to a complete production run, but in weeks since we first showed it at Maker Faire, response has been pretty positive, so we're seriously considering moving forward to make it a full-fledged member of the BlinkM family.
Stay tuned!


