
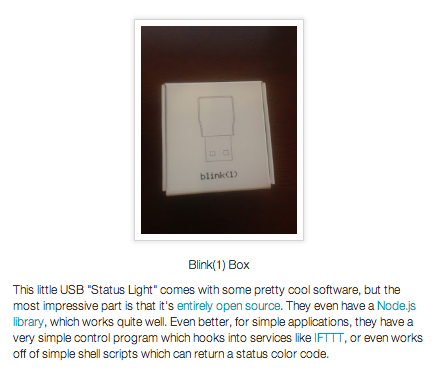
Nice review of blink(1)
/Chris Moyer, author "Building Applications in the Cloud: Concepts, Patterns, and Projects" and a new blink(1) user, published a nice review of blink(1) for anyone curious about them. Thanks Chris!
Chris Moyer, author "Building Applications in the Cloud: Concepts, Patterns, and Projects" and a new blink(1) user, published a nice review of blink(1) for anyone curious about them. Thanks Chris!
Instructable user yodacraft3 made a great guide on how to build an "Arduino Mood Lamp Using BlinkM". You're shown how to set up a BlinkM and then the much brighter BlinkM MaxM, using either an Arduino or LinkM. Check it out! (And thanks @DIYEngineering for bringing it to our attention!)

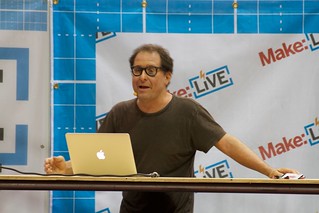
Mike gave a great talk at Augmented World Expo 2013. (as did ThingM advisor and good friend Ben Cerveny!) AWE brings together people to talk about the latest in augmented reality. Mike's talk was titled "Sculpting the Augmented World". Slides and notes are below.
He was also interviewed by AWE.tv and that's up on Youtube now.
Sculpting the Augmented World: Scale and Narrative in Augmented UX design by Mike Kuniavsky


We now have two distributors of blink(1): Maker Shed and Inventables.
Both Maker Shed and Inventables also carry our BlinkM-family products too. We are very excited to have our gadgets offered by two companies that carry so many other neat products. Check them out!
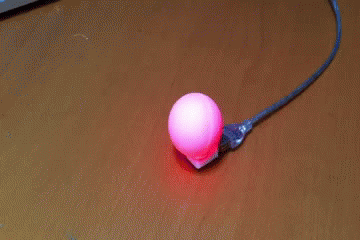
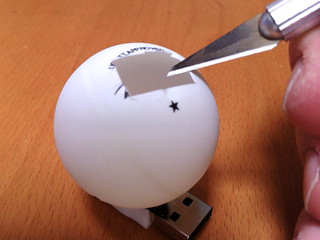
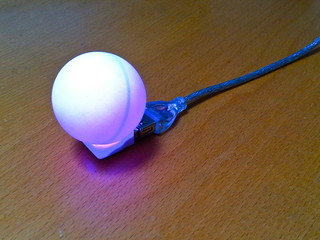
Here's a quick hack to try if you have a blink(1) and want a light that is large and viewable from more angles than what blink(1) normally provides. It does make things a bit larger though. It turns out ping-pong balls make excellent diffusers for LEDs. Here's how to attach a ping-pong ball diffuser to your blink(1) so you can put a computer-controlled notification light just about anywhere.

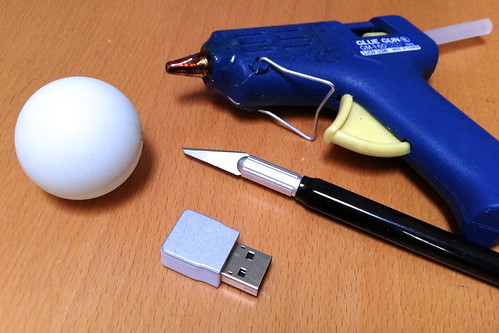
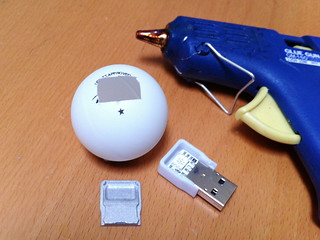
Tools Needed: - blink(1) USB RGB LED - white ping pong ball - hobby knife - hot glue gun - USB extension cable (optional)
How to Build It
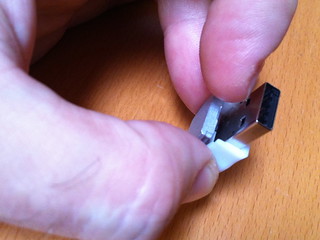
First, pop off the metal top of the blink(1). Just stick your fingernail in the divot near the USB connector and pull up.
Next, cut a blink(1)-sized hole in the ping-pong ball using the hobby knife. I've found that just cutting out the logo & lettering is the best:
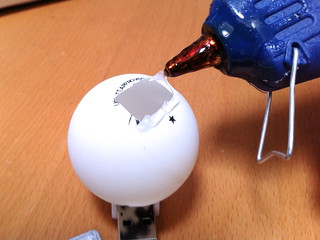
Now you're ready to hot glue. So get the hot glue plugged in and warmed up:
And put a small bead of hot glue around the edge of the hole you cut:
Then sandwich the ping-pong ball onto the plastic base of the blink(1):
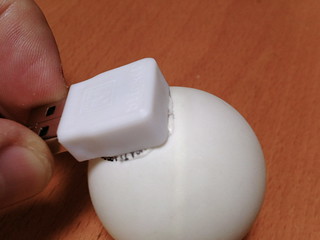
Now you're done! To make it even more useful, get a USB extension cable and you can place your new omni-blink(1) in any place you want.
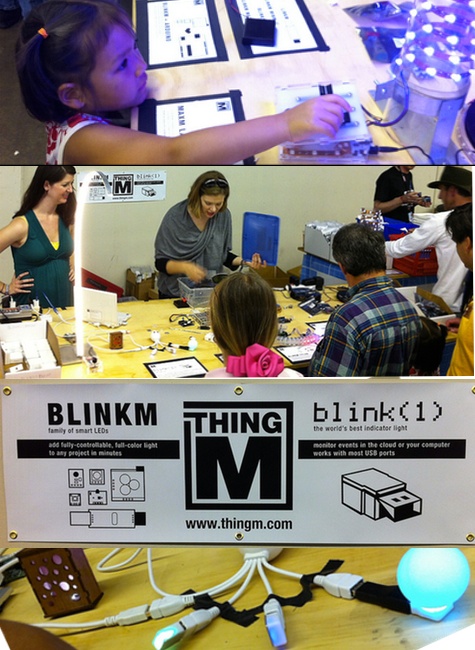 Whew, MakerFaire Bay Area 2013 is over and it was astoundingly fun. Not only did we get to interact with so many people doing awesome things with ThingM products (like these BlinkM MinM earrings) but we got to show off a bunch of projects made with blink(1) and BlinkM-family stuff to thousands of new people. We heard tallies of 120,000 people showed up over the weekend, and we love seeing the concepts the Maker community inspires diffusing out into the larger world, as this LA Times article speaks to.
This year not only were we fortunate enough to have a ThingM table in the Maker Shed (Thank you Leah, Alex, Will, Carlyn, & Mike for helping staff it), but we also gave talks. Mike spoke about the future of manufacturing in a work filled with Maker-inspired tools and techniques, while Tod gave a talk on the process we went through to take blink(1) from an idea to Kickstarter to production.
Below are slides from both talks.
Mike's talk:
The New Product Ecosystem: How design will reinvent manufacturing (Maker Faire 2013) by Mike Kuniavsky
Tod's talk:

From Prototype to Kickstarter to Production: How blink(1) was made by todbot
They said it couldn't be done: a robot that only does high-fives. They were wrong. Thanks to a courageous BlinkM MinM who donated his brain to be rewritten with an BlinkMuino ATtiny85 Arduino sketch, the High-Five Robot exists.
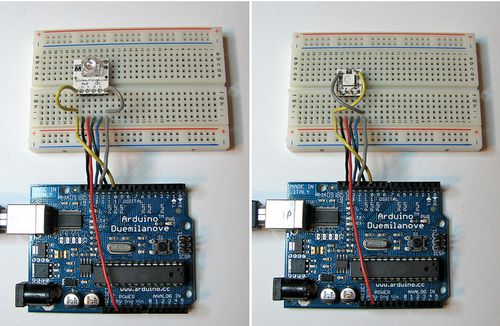
I finally got around to updating the BlinkMuino guide for turning your BlinkM, BlinkM MinM, or BlinkM MaxM into a tiny ATtiny85 or ATtiny84 Arduino system. BlinkM boards make great tiny development boards, especially if you're interested in driving LEDs. BlinkM MaxMs are particularly great because they have more inputs and those three beefy MOSFET power transistors. And MinMs are good because they're super tiny, but still contain a fully-programmable computer. Thankfully, the ArduinoISP sketch has also been updated for Arduino-1.0, meaning you can use your Arduino as an AVR-ISP programmer, like this:
Here's the original video I made about BlinkMuino:
We'll be showing off some examples of BlinkMs programmed with Arduino at Maker Faire, some say "hi"!
On the Raspberry Pi forums, Will is working on an Internet-connected catflap using blink(1), Raspberry Pi, Twine. The Twine is the sensor (it has a tilt-detection) and the Raspberry Pi + blink(1) are the output notification. Can't wait to see the final installation!
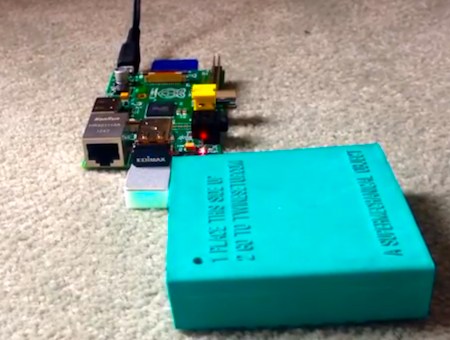
Here's a video he made demonstrating the general idea.
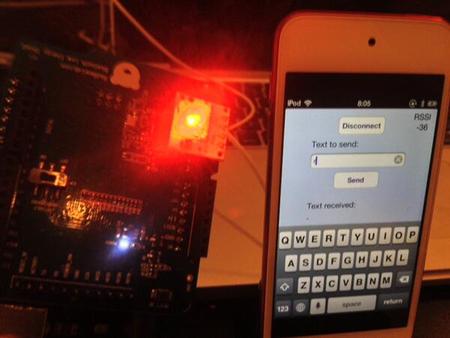
Twitter user Yoshimune KITTA made two cool BlinkM hacks, complete with pictures and code. It's really cool to see how small the code can be, thanks to powerful libraries.
The first is a Bluetooth 4.0 Low Energy (BLE)-controlled BlinkM. Control BlinkM from your iPhone! The code gist: BLE Shield + BlinkM gist
The second is an Xbee-controlled BlinkM. The code gist: XbeeBlinkM
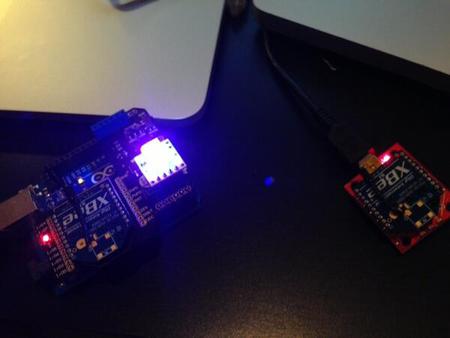
Thanks @epic_yoshimax!

THINGM™ © 2007-2021 / Legal & Credits