ReflashBlinkM: Update your BlinkM's firmware

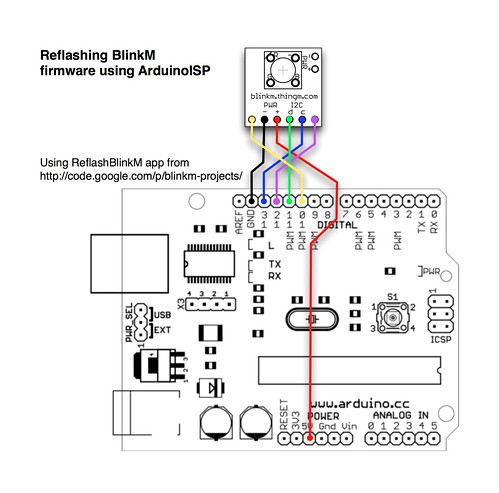
All BlinkM-family devices can have their firmware updated. This makes them great for tiny development boards for ATtiny processors. ReflashBlinkM is an application that makes it easy to put back the original firmware or update a BlinkM to the latest firmware. Previously you needed an AVR ISP programmer like the AVRISPmkII or the USBtinyISP. Thanks to the ArduinoISP sketch that ships with Arduino, if you have already have an Arduino, you can easily reflash your BlinkM with new firmware.

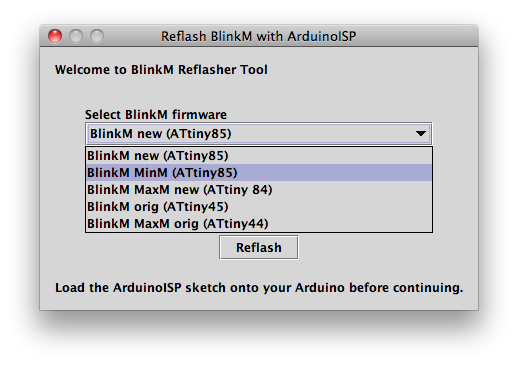
The ReflashBlinkM application is a tool for Mac OS X and Windows that uses ArduinoISP to help you reflash BlinkMs to their default firmware.

This is what it looks like:

Here's one way of hooking up a BlinkM to an ArduinoISP:

And here's a video of a BlinkM MinM being reflashed: http://www.youtube.com/watch?v=PMBtjAPBdwI

For full instructions, see the ReflashBlinkM page in the blinkm-projects Google code site.

ThingM Project Feature: Seito Odoshi

Seito Odoshi                                                                                     Creator: Tokyo University of the Arts

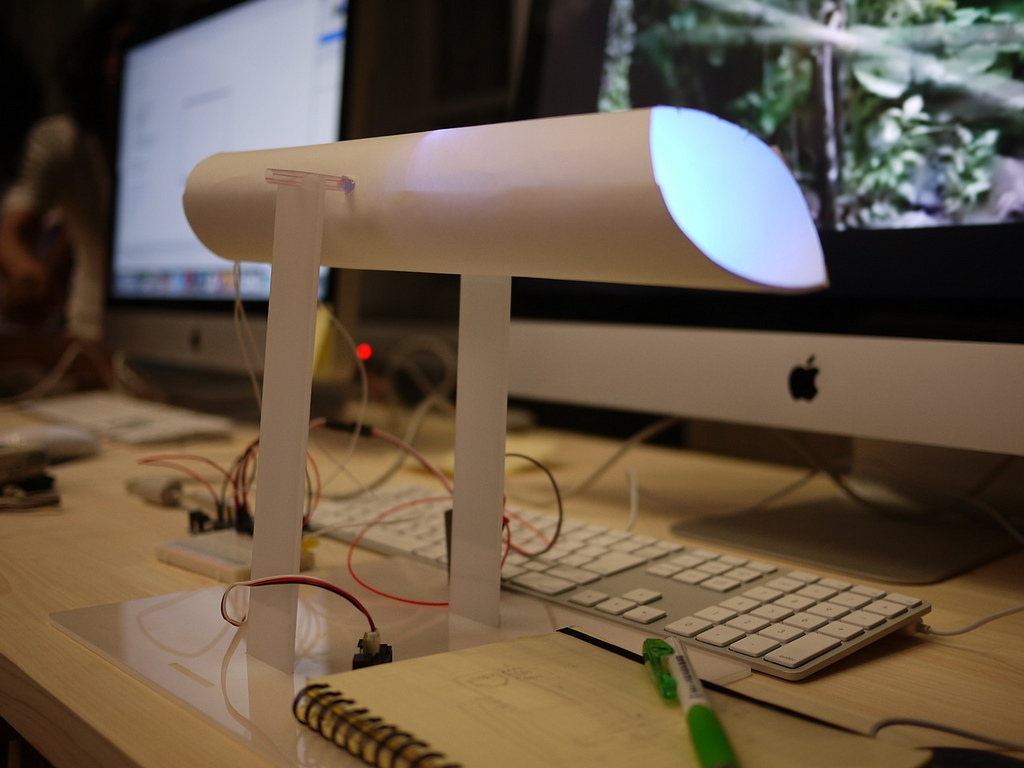
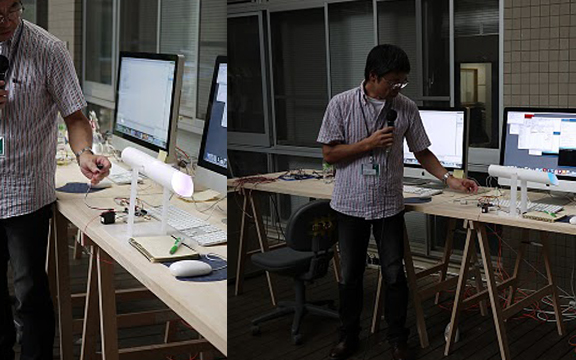
A fall workshop at the Tokyo University of the Arts. Twenty two students worked in groups to develop and prototype a project within a few days.

Team 3 created Seito Odoshi (a students intimidator). The object is used to calculate how long students sleep. Using a distance sensor and a BlinkM - the Seito Odoshi warns someone by moving the tube and changing its color.

ProjectBlog_Seito Odoshi_1 (Downloadable PDF)

ThingM Project Feature: Burning Man Bike

http://www.youtube.com/watch?v=2rD8OIvDrXE BlinkM Burning Man Bike     Creator: Chris Ellerby

For this amazing Burning Man bike project I took a Worksman trike and lined the frame with RGB LED light bars and wired them all to a single controller. The light bars can be easily set to display a single color, flashing color sequence, or slow fading color sequence, all from a single button. The bike is also wired with a stereo sound system, a 12v 18am hour SLA battery, and even has space left in the rear basket for a small cooler. To push this project over the top, the BlinkM MaxM made its glorious return. I took a small plastic skull and mounted the MaxM inside with a 9v battery and a toggle switch. The MaxM was programmed with a random sequence of colors, and the whole thing was attached to the front of the bike. As you can see from the following video, it really completes the project. That said, I have one more MaxM that I simply must put elsewhere on the bike, Im just looking for the perfect spot!

ProjectBlogTemplate_2 (Download PDF)

BlinkM Project Feature: Ardupilot

BlinkM as an ArduPilot Mega Indicator Creator: Josh Villibrandt

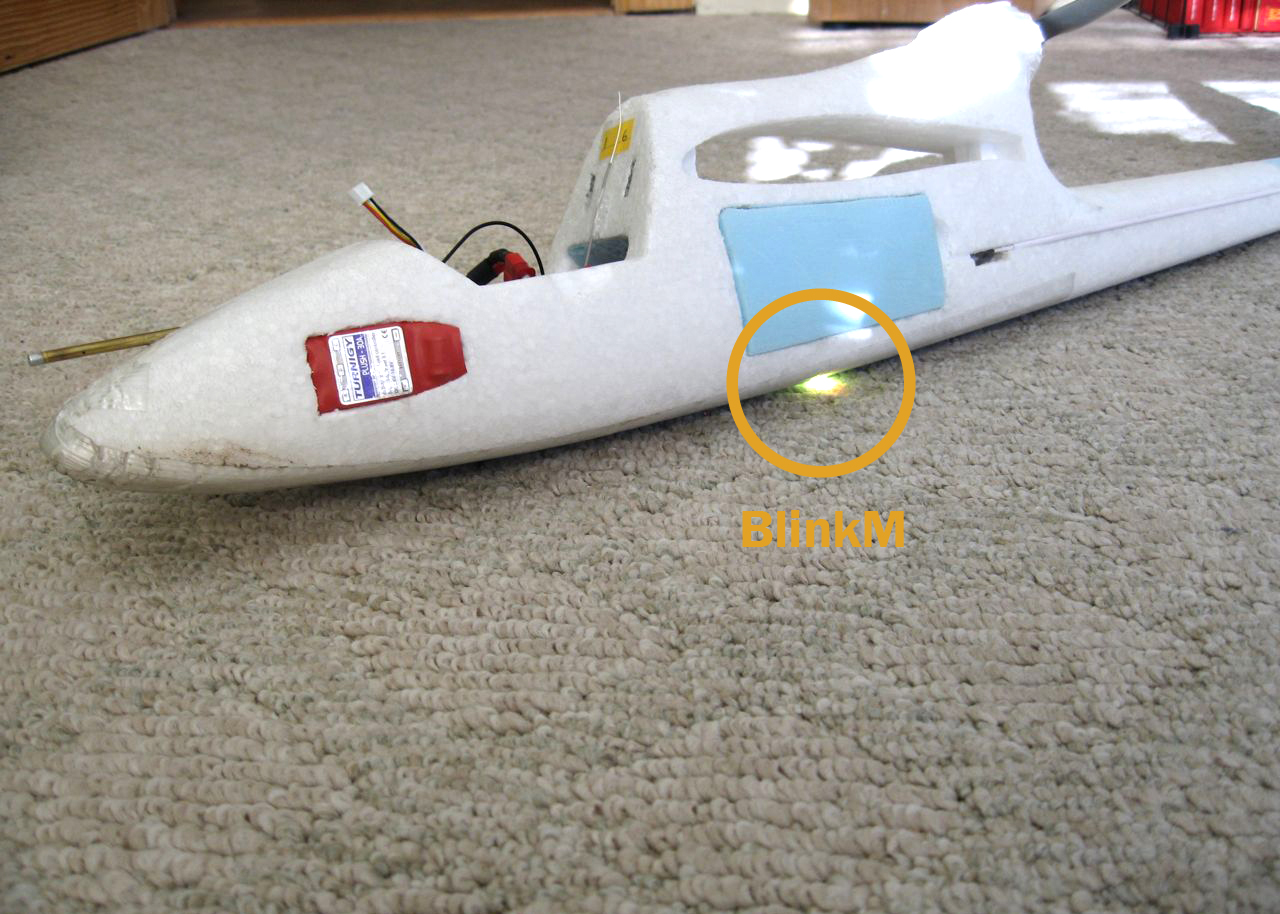
The ArduPilot Mega (APM) is an open-­‐source autopilot for RC aircraft that is currently under development. The APM package consists of a main computer board based off Arduino, a sensor board, and various other attachments to complete the whole system. In this APM project, it was decided that all of the APM components would be placed inside the fuselage body. While this is great for the appearance of the plane and the safety of the components, it also means that any status LEDs built into the APM components are hidden from view.

Materials Needed:

• BlinkM (Or BlinkM MinM or BlinkM MaxM) • RC Plane • ArduPilot Mega w/ Oilpan (the sensor board) • Four female-­‐female jumper wires • X-­‐Acto knife • Hot-­‐glue gun

BlinkM Project Feature: Autopilot (download PDF)

New BlinkMSequencer Features

ThingM's Multitrack BlinkMSequencer has been updated to work with both LinkM and with Arduino running the BlinkMCommunicator sketch. Download:

New Features and improvements include:

  • LinkM and Arduino connectivity support

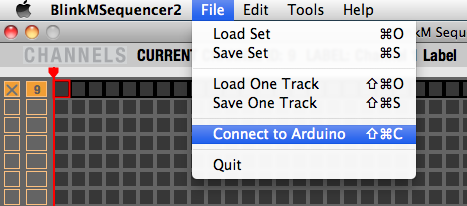
    Previously, you used the new Multitrack Sequencer if you had a LinkM and the older single-track sequencer if you had an Arduino. Now the Multitrack Sequencer has Arduino connectivity suppport. To use:

    • Load the BlinkMCommunicator sketch onto your Arduino
    • Unplug the Arduino, plug in your BlinkM, plug back in the Arduino
    • Choose the "Connect to Arduino" item in the File menu
  • Gradient creator

    It's now easy to create smooth gradients between color cells. To create a gradient, make a selection starting at your preferred start color and ending on your preferred ending color. Then choose "Make Gradient" from the Edit menu.

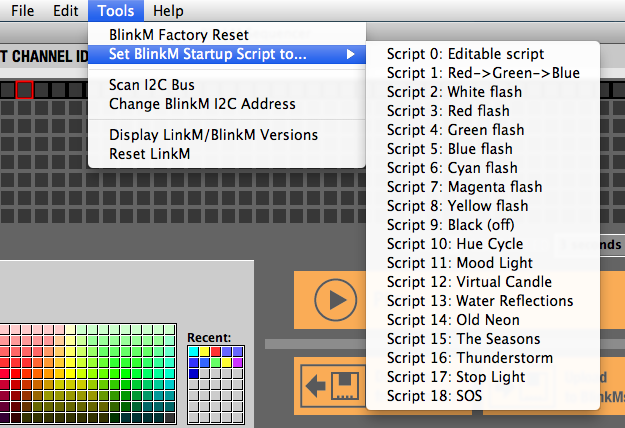
  • Set BlinkM to use ROM scripts like "Virtual Candle" and "SOS"

    BlinkM has 18 built-in ROM light scripts. A BlinkM can be told to play these on startup instead of a programmable script. Now you can easily select one of these scripts to run.

  • Change I2C address of BlinkMs

    In order to make best use of the multitrack aspect of the sequencer, you need to assign each BlinkM its own I2C address. The previous way of doing this was with "BlinkMTester" Arduino sketch in the BlinkM_examples bundle. Now you can do it from within the sequencer.

  • Copy-paste colors within a track

    The cut/copy/paste commands work to let you copy sections of tracks. This is really handy to create repeating color sequences. The left/right arrow keys can help position the paste point to make quick work of filling up an entire track.

  • Fixed colorchooser same-color-twice bug

    One of the biggest pet peeves we've had with the standard Java ColorChooser we use in the sequencer is the fact you couldn't select the same color twice in a row. There is now a modification to the ColorChooser to allow you to do this.

  • Tooltips on colors in a sequencer

    When hovering over a color slot in the sequencer, you now get a tooltip showing the decimal RGB value.

  • Visual indication of connectedness

    The "Upload to BlinkM" and "Download from BlinkM" buttons now reflect if you are currently connected to a LinkM or Arduino by being disabled or enabled.

Autumn Lantern with BlinkM

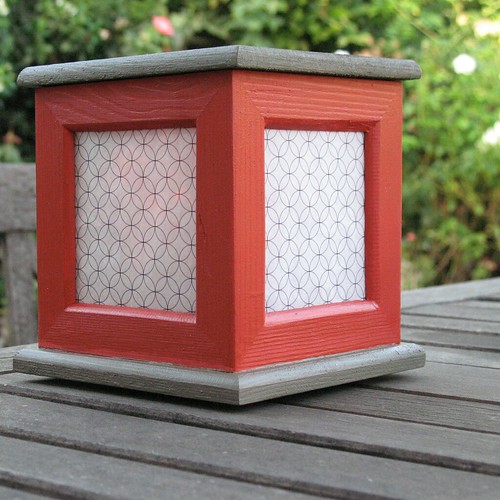
Lantern in Daylight It's getting a little chillier in Southern California, but as an East Coast transplant I miss watching leaves change color.  Using a BlinkM has been a great chance for me to bring fall color into my life in the form of a Lantern.  When using a regular, tea light based lantern the only way to change the color is with the physical materials. Using a BlinkM I could imitate the way the leaves glow in the sunset with the light itself.

This is what it looks like done and blinking, kind of... the colors are a lot warmer than they are in the video (see the picture below)
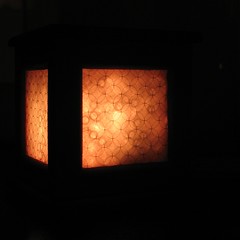
IMG_6848

http://www.youtube.com/watch?v=fcX6st6s7fg

Materials

For the non-BlinkM parts of this project I used items found in major chains (craft, hardware, office supply, grocery). All the BlinkM related items were sourced from SparkFun.

To create the light:

BlinkM from SparkFun or FunGizmos
LinkM from SparkFun or FunGizmos
Fall Flicker Script File The light script I wrote
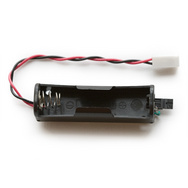
The 5V DC to DC Step Up - 1xAA at SparkFun may seem a bit expensive, but it only uses 1 AA battery (disposable or rechargeable) to generate the 5V the BlinkM needs. Super super handy. (photo is theirs)

-

To make the lantern:

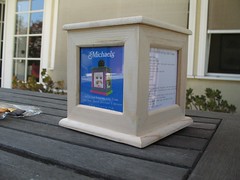
IMG_6692 A rotating photo cube from Michael's
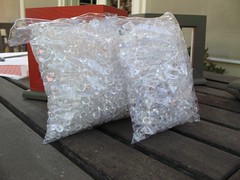
IMG_6740 Clear acrylic beads, also from Michael's
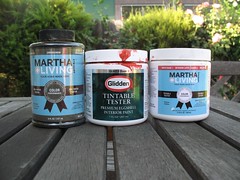
IMG_6755 House paint in sample sizes
tin foil
tracing paper
a phillips head screwdriver to remove the rotating platform
a flat razor blade to scrape labels off with

-

Step 1: Pick Your Lantern

The lantern I used for this project is actually an “Unfinished Rotating Photo Cube”  from Michael’s.  I couldn’t find it on the web site, but they live in the in the paint-your-own section and run about $3.99 at both the one in El Segundo and in Santa Monica.

Pro: It is certainly big enough to a stash  most BlinkM appropriate power sources in it.

Con: There isn’t, however, a lot of natural diffusion going on to help direct the light from BlinkM out in all 4 directions.  I picked up some tracing paper, aluminum foil and “Decorative Accents - Clear Sparkling Jewels” (again not available online from Michaels) to help deal with this later.

Step 2: Paint The Lantern

I knew I was going to go with a classic fall palette and was not really interested in spending a bunch of time custom mixing so I went a few doors down from Michaels to the Home Depot to rustle up some house paint samples.  The queen of How-To herself, Martha Stewart, has a paint line, and, well, anything else you want to say about her, Martha curates a mean home décor color palette.  So Heath (think tree bark), Milk, and Saffron (daylight interest?) ended up in my grocery basket.

IMG_6697 IMG_6699 IMG_6696

Something to keep in mind: the color picked for the inside of the lantern becomes a reflecting surface for the BlinkM.  The lighter or brighter the color the more light will be bouncing around.   The light will also pick up any color that is in the paint, too.

I’m not actually going to spend a lot of time explaining how to paint in general since these lanterns are pretty basic. Some tips before you get started though -

-       Remove the spinning base (Phillips head screwdriver)

-       Sanding is always recommended (but I didn’t)

-       Paint your lighter colors first

-       Super cheap craft paint  brushes, even the foam popsicles are fine.

-       You will want at least one sharp edged detail brush to do edging where you have two colors meet.

-       Let things dry between coats. Really.

I made some experiments, but in the end the winner was the one shown with Saffron for the mid section and Heath for the lid and bottom lip.
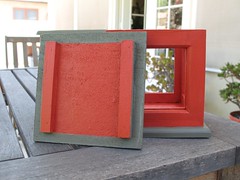
painted cube

Once it was all totally dry I put the rotating bottom back on, too. Well, actually, I didn't and plastic beads got a little everywhere when I did later. So you, you, should put yours back on here.

Step 4: Diffuse

As I mentioned before, the photo cube wasn’t designed to be a light source so it doesn’t have a nice shiny interior or frosted glass or anything like that.  Thankfully those kinds of features are easy to add in this case.

A) For a frosted glass look, line all  4 panels with tracing paper. Optionally you can print a pattern onto the tracing paper if you have an inkjet printer with a rear-loading tray. (link to PDF of pattern) I chose to put the tracing paper on the outside of the acrylic pieces for a softer feel. Putting the tracing paper on the outside also meant I could stress a bit less about getting absolutely every last trace of the adhesive from the stickers off, too. Shh. I didn’t tell you that.  (Soaking in hot water helps, razor blade makes neat work of it but be careful)

IMG_6720 IMG_6723 IMG_6728 IMG_6724

B) Put a square of tinfoil, shiny side up,  at the bottom of the lantern to reflect light back up since the BlinkM will be face down.   ( If the BlinkM was going to be sunny-side up I would have adhered the tinfoil to the lid)

IMG_6734 IMG_6736 IMG_6737

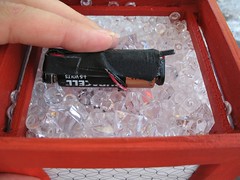
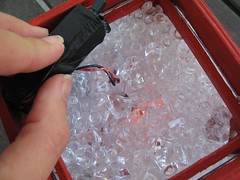
C) Add the acrylic beads / frosted marbles etc. to level high enough to reach the top of the lantern panes but leaving room to create a cozy little nook for the BlinkM. Check the effect with an actual BlinkM attached to the battery (the test pattern that comes preloaded on the BlinkM’s is fine for this)

IMG_6752 IMG_6753

Step 5: Let there be light

BlinkM in LinkM attached to the USB port of a computerUnlike a regular candle based lantern the “flame” color is also under your control.  The light itself is the real protagonist. I didn’t finalize my sequence for sure until after the lantern was painted and it would be easier to see what it looked like diffused.   If you want to just copy my pattern, these are the steps:

A) Download the BlinkM script by right-clicking or ctrl-clicking on the link and save it somewhere you can find it. It's called BlinkM_FallFlicker_v1_0.txt

B) Download the BlinkM Script Tool and put it in the same folder/directory as the script for convenience. (download for Mac OS X, download for Windows, or get the source code)

C) Plug the BlinkM into LinkM and plug the LinkM+BlinkM into the USB port. (picture above)

D) Open the BlinkM Script Tool and press the “Load” button on the bottom left of the screen (labeled 1). You’ll get a file browsing dialog box. If you’ve put the Script Tool and the script in the same folder you should see "BlinkM_FallFlicker_v1_0.txt" immediately. Otherwise navigate your hard drive in the usual fashion to find BlinkM_FallFlicker.txt, select it as the file you want to load, and press the Open at the bottom right of the dialog box.

E) Back in the main BlinkM Script Tool window third from the left is the "Send" button. (labeled 2)  That is what puts the program on to the BlinkM.  Hit that and you’re done. You can remove the BlinkM and attach it you your external power supply for testing in your lantern.
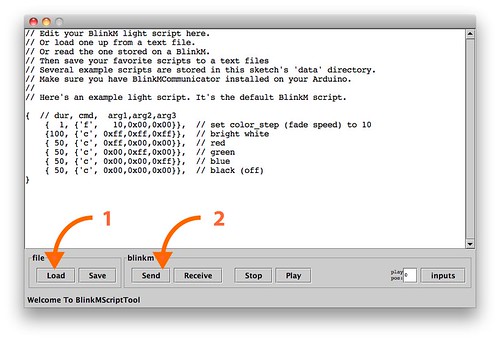
scriptToolWindow

If you want to change the Fall Flicker script you can do so right in the Script Tool.

Each line has the format:

{time, { c , red_value, green_value, blue_value}}

The red, green and blue values are on a scale from 0 to 255 which are represented by 0x00 to 0xFF in Hexadecimal. The script files can mix decimal in with the hex if that is easier for you. Mine is all in hex because I created the original Fall Flicker script as an export from the BlinkM Multitrack Sequencer (found from the right hand column of the LinkM page).

The BlinkM Multitrack Sequencer lets you visually create patterns where each “note” persists for the same amount of time.  That doesn’t work for flickering. While you absolutely can put the same color next to itself to create longer chunks, I found it easier to save my color sequence as a text file that could be opened it up in a text editor. Once opened I could randomly assign color lengths to each step. To preserve the custom lengths I used the script tool to do all further tweaking.

Going Further

And that was it! This is just one color scheme for a photo-cube lantern.

  • You might want to go white and orange for the wood on the outside with a green “flame” pattern for St. Patrick’s Day.
  • Or make a silver lantern with blues for an “under the sea” theme…
  • Gold lantern with bright jewel tones all over the map for a treasure chest lantern…

These are just some of my random ideas. Have some fun!
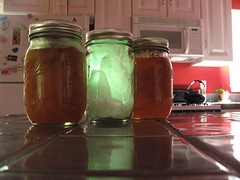
IMG_6811Honestly, though, the quickest and the dirtiest thing I could have done is grab a large glass jar, some tracing paper, shoved in a BlinkM, thrown some frosted marbles to help with light placement in and called it a day. Really. In fact I did. Let's call this one "Summer in a Jar" for my friends back East who are going to want to save up the last traces of summer and keep them around for January. (see video)

http://www.youtube.com/watch?v=KgipD-6Td4M

Remember, you can let the light be the attraction rather than the physical form of the lantern itself, so I’d encourage you to experiment.  If you do decide that you want to go off the map and use something other than the Michaels’ photo-cube there are only three things really to keep in the back of your mind:

  • Where am I going to stash the batteries?
  • How am I going to help the light reach where I want it go ?
  • How am I going to turn it on and off?

Answer those questions and you can stick a little custom light show in the form of a BlinkM just about anywhere.
ThingM Newsletter for August 26, 2010

CONTENTS - Welcome Hot Solder UK!

- New Data Sheet for BlinkM/MaxM/MinM

- Did you know that BlinkMs takes sensor input with no microcontroller?

- Sketching in Hardware 2010: a recap

- Appearances

- Unsubscribe

WELCOME HOT SOLDER UK

++++++++++++++++++++++++++++++++++++++++++++++++++++++

We are pleased to announce our latest distributor: Hot Solder UK, based in the historic city of Exeter in Devonshire County, England. Wikipedia lists it as "the most south-westerly Roman fortified settlement in Britain" and "one of the top ten most profitable locations for a business to be based." There's also a pun to be made about the town's location on the river Exe and Microsoft filename extensions, but we're working very hard not to make it. ;-)

We are very pleased to have Hot Solder as one of our distributors. They currently have BlinkMs, LinkMs and MaxMs in stock.

http://www.hotsolder.co.uk

NEW DATA SHEET FOR BLINKM/MAXM/MINM

++++++++++++++++++++++++++++++++++++++++++++++++++++++

We updated our BlinkM data sheet to include all three variants, including special sections on physical specifications for all three products, detailed information about how they vary, and updated specs (the new MaxMs are 18% more blindingly bright than the old ones, and MinMs can have fade times as long as 227 days--yes, days--for example).

You can download it here:

http://thingm.com/fileadmin/thingm/downloads/BlinkM_datasheet.pdf

BLINKMS CAN ACT ON SENSOR INPUT WITH NO CONTROLLER. REALLY? YES!

++++++++++++++++++++++++++++++++++++++++++++++++++++++

In many cases, BlinkMs can be interactive with no external hardware or microcontroller. Every BlinkM can change its behavior using its own inputs.

BlinkM MaxMs have analog inputs that read values from GND to +5v and can change either change brightness or color based on that input, which can be a simple potentiometer, or any sensor that can be made to output up to 5 volts (these are often called 5V TTL-compatible outputs). There are bend sensors, passive infrared sensors, tilt sensors. Thousands of TTL sensors can be directly connected to BlinkMs and used as inputs to switch between built-in scripts.

BlinkM MinMs and recent (firmware version {‘a’,’d’} and above) BlinkMs have digital input capabilities. This capability makes it very easy to directly connect a button, a switch or a simple binary sensor and change between behaviors.

Direct input makes it much easier to create sophisticated reactive lighting effects using very little additional hardware, since the BlinkM will handle most of the input work for you.

For more info and example code, see sections 3.4 and 4.5 in our new data sheet for information on input commands (which are "Knob Read RGB", " Knob Read HSB", "Jump, relative", "Input Read & Jump", and "Input Jump Immediate"). And yes, for those keeping track, we HAVE introduced the equivalent of GOTO into the command set. ;-)

http://thingm.com/fileadmin/thingm/downloads/BlinkM_datasheet.pdf

You can upload scripts that use the new commands to BlinkMs with the BlinkMScriptTool for Arduino and BlinkMScriptTool2 for LinkM (both written in Processing).

You can find the source to BlinkMScriptTool here:

http://tinyurl.com/2evp2bh

And BlinkMScriptTool2:

http://tinyurl.com/2fdzqj9

SKETCHING IN HARDWARE: A RECAP

++++++++++++++++++++++++++++++++++++++++++++++++++++++

Mike organized and ThingM sponsored the fifth annual Sketching in Hardware meeting this year in LA. A group of 40 toolkit builders, educators, manufacturers and users met and talked (and talked…and talked...) about how to use electronics as a creative medium.

As in years past, we were flattered at the fantastic group of folks who accepted our invitation and traveled from all over the world for the event.

Some of the awesome new technologies shown at Sketching included:

Phil Van Allen's NETLab Toolkit: http://www.netlabtoolkit.org/

Shigeru Kobayashi's physical.wonderfl online hardware IDE: http://physical.wonderfl.net/index_en.html

Ed Baafi's ModKit, another online IDE for visually programming Arduinos: http://www.modk.it/

Jason K. Johnson's Firefly, which connects the Arduino with the Grasshopper generative architecture environment: http://www.grasshopper3d.com/profile/firefly

Nwanua Elumeze showed the ingenious Schemer online IDE and light sensor programming system: http://www.aniomagic.com/schemer/help.php

Rob Faludi demoed his ZigBee Internet Gateway: http://www.faludi.com/projects/zigbee-internet-gateway/

Others presented about how lightweight physical computing tools are being adopted by everyone from middle school children to dancers and climate scientists.

The presentations from many of the attendees are downloadable here:

http://www.sketching10.com/presentations/

The event itself was held in the historic, and awesome, LAX Theme Building, and at Art Center College of Design's equally awesome Wind Tunnel building. Here's a history and profile of the Theme Building from Wikipedia:

http://en.wikipedia.org/wiki/Theme_Building

You can find photos from the event on Flickr:

http://www.flickr.com/search/?q=%23sketching2010

APPEARANCES

++++++++++++++++++++++++++++++++++++++++++++++++++++++

August 28: Come to Crash Space LA, the hacker space Tod co-founded, for a fundraiser and demo of the secret Hackerspace Challenge product that Crash Space has been working on! More info: http://bit.ly/ajifDn

September 14: Mike will be part of a group of folks giving the closing keynote--a tribute to Mark Weiser--at Appnation in San Francisco: http://www.appnationconference.com/csch.php

September 23: Mike will be on a panel discussion of Open Hardware business models at the Open Hardware Summit: http://www.openhardwaresummit.org/

September 30: Mike will be talking about frameworks for the design of devices and services at Mobilize 10 in San Francisco: http://events.gigaom.com/mobilize/10/

Welcome Hot Solder, our newest UK distributor!

Hot Solder Electronics, hotsolder.co.uk, is a UK/EU distributor of ThingM products We are very pleased to announce that Hot Solder Electronics is the newest UK/EU distributor for ThingM products. Hot Solder are a full-featured electronics boutique. They sell a hand-selected range of breakout boards and development modules, basic components and tools. They even offer engineering, PCB layout and firmware development services. We are very happy  to have them as part of the extended ThingM family.

You can find BlinkMs on their site here: http://www.hotsolder.co.uk/blinkm-the-smart-led-272-p.asp

Document your BlinkM/MaxM/MinM project, get a free MinM

We want to know what you (or anyone you know) has done with BlinkMs, MinMs or MaxMs!

Send us documentation of your working BlinkM project and we will send you a MinM (which normally sells for $13-20). The first 50 people who send in a description that meets the requirements below will get a free MinM. If we think a description is particularly awesome, we'll put it in our projects gallery, give you full credit, and link it to your blog/FB/Twitter page.

Here's what we need from you:

  • A 300-word (or more!) step-by-step description of what you did. This doesn't have the be the best documentation in the universe, but it should describe the project well enough so that someone could follow the steps and repeat it. For example, you could start with why you did this project, then describe what materials you used, what steps you followed, what you ended up with, and what you learned from it.
  • At least 5 high-resolution (800x600 or more) images of your project. Ideally, these pictures will illustrate various parts of your description.
  • Your address, so we can mail you a MinM.

Email the description, photos, and address to info@thingm.com.

This offer is good until August 13, 2010 or until we've gotten 50 complete descriptions, whichever comes first, so hurry!

Note: by sending us your description, you agree that we can use it in our project gallery and newsletter, but we promise to give you credit if we use it.

Open Source BlinkM/LinkM Code on Google Code

We're continuously developing small pieces of code to do interesting things with BlinkMs, and we decided to put much of this on Google Code, Google's Open Source code repository. You can find BlinkM example code, all the code for our TweetM Wifi Twitter client, and the experimental code for FreeM, our infrared BlinkM controller here:

http://code.google.com/p/blinkm-projects/

And you can find the source for LinkM firmware here:

http://code.google.com/p/linkm/

Since we're firm believers in Open Source as a model, we encourage everyone to take a look at the code, play with it, change it and check it back in. We'd love to know what you make with it, and if you have questions/comments/thoughts, please feel free to post them here.